The Laugavegur Trail
This is the second part of a two-part blog series on the Laugavegur Trail. The first was about our actual hike, and this one is geared towards how to prepare to do the trek.
When to go
Think about when you want to do the trek. We went at the end of August, which turned out great for us. It can be a treacherous hike, there are markers along the way commemorating hikers that perished during blizzards; one of them was even dated June 27th. The trail is usually open from some time in June until September. We had clear skies for the three days we hiked, which is unheard of in Iceland.
Camp or huts?
Decide if you want to camp or stay in the huts. We camped, which means we had to pack that much extra gear; tents, cooking equipment, etc. We’ll get into gear later. Camping at each hut costs about ISK 2500, and staying in the huts is around ISK 8000 (per person, per night).
They take credit cards at all the huts, so you can pay for your camping that way.
Figure out if you want to tackle the trail from north to south or from the opposite direction. We went from north to south; Landmannalaugar to Thorsmork.
Getting there
Book your bus trip to get there. We caught the bus in Reykjavik at 8am at the BSI terminal, and arrived at Landmannalaugar at 1pm. Half of the trip is on paved roads and the second half gets a bit more mountainous with a couple of river crossings. During the first half, there are a few stops to pick up other travellers. One of these stops takes you to a grocery store where you can pick up a few things for the hike. We bought some fruit and vegetables to add to our food supply.
Book your bus tickets here.
We booked from Reykjavik to Landmannalaugar, and we didn’t book our return trip. Once you get to Thorsmork, you can easily book your bus out of there from the hut. The bus leaves at different times from the different huts in Thorsmork (I’ll explain more about this later, it got a little confusing at the end of the hike for us). We stayed at the Volcano Huts in Thorsmork when we finished our hike, and caught the bus at 8am the next day. The bus also leaves at 4pm and 8:40pm.
Huts
Hrafntinnusker
Alftavatn
Huts from north to south
Landmannalaugar– info and booking here.
Hrafntinnusker– info and booking here.
Alftavatn– info and booking here.
Hvanngil– info and booking here.
Emstrur– info and booking here.
Þórsmörk (Thorsmork)- info and booking here.
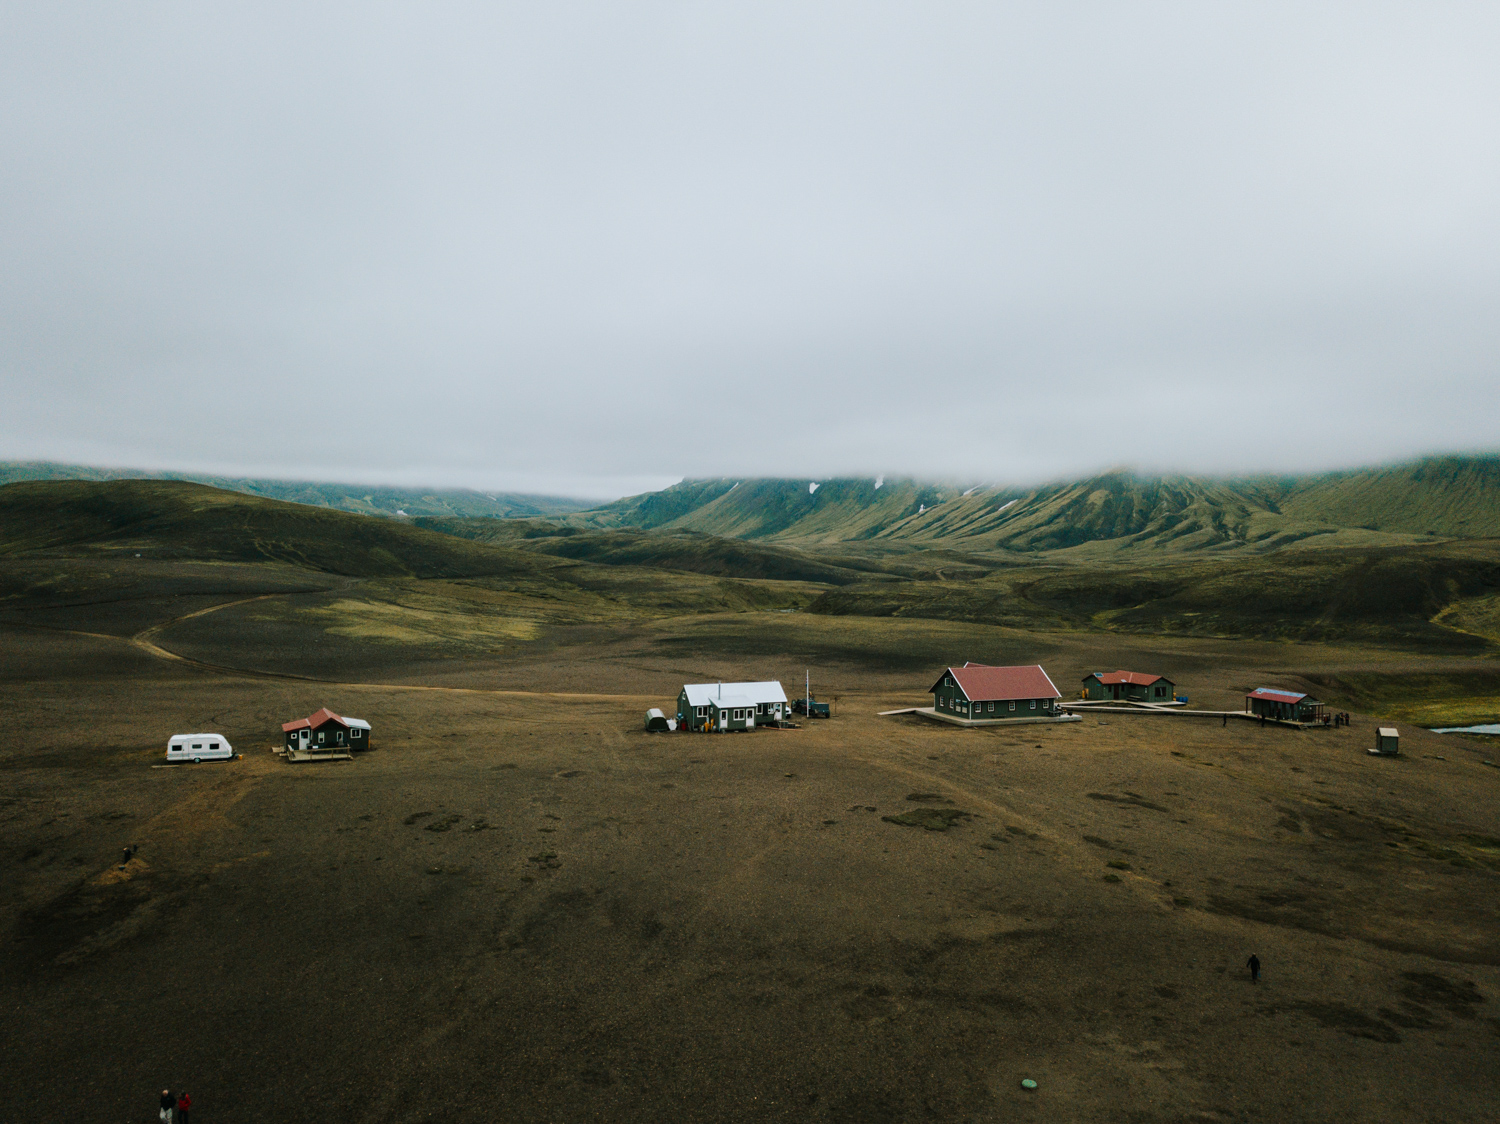
There are two other huts at Thorsmork: We camped at the Volcano Huts which can be found here. The other one is Basar.
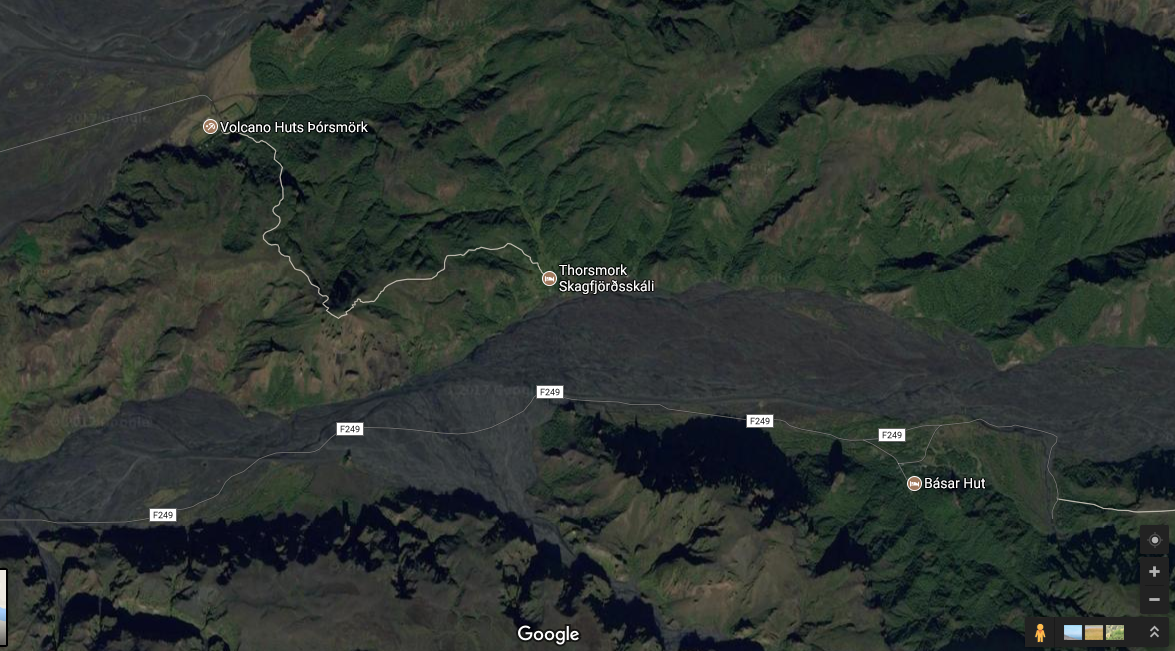
This map shows where the three huts in Thorsmork are in relation to one another. The bus stops at all three huts.
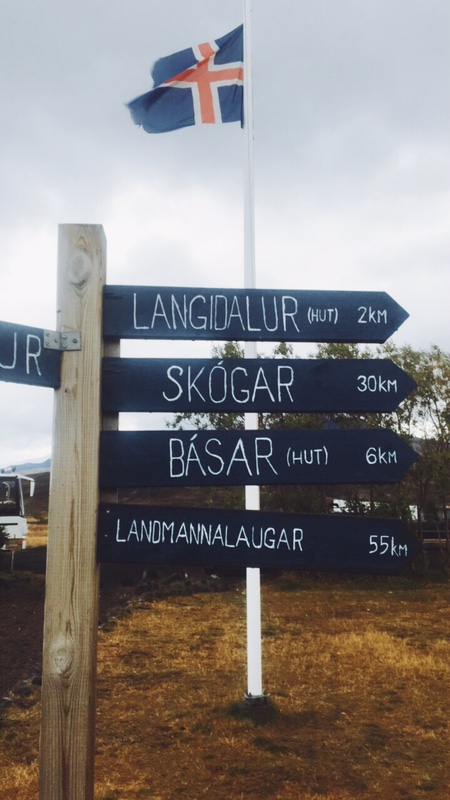
Where the other huts were in relation to the hut we stayed at (Volcano Hut). The sign also points towards Skogar, if you want to continue on with your trek.
The actual trek
These are the two best descriptions I’ve read of the trek from north to south: www.fi.is/en/hiking-trails/laugavegur and www.nat.is/laugavegur-hike-from-landmannalaugar-to-thorsmork/
I’ll sum it up really quickly here what the route is like;
Landmannalaugar-Hrafntinnusker (12km)- tough part with lots of steep climbs. Can be covered in snow once you get up high, and the fog can be bad here. There are wooden stakes every hundred metres to guide the way in the fog.
Hrafntinnusker-Álftavatn (12 km)- stunning views coming down to Álftavatn. Steep descent down to the hut, so be careful. Then you have to cross your first river, which is clear and cold; safe to drink. The hut is another 45 minutes to an hour from the river.
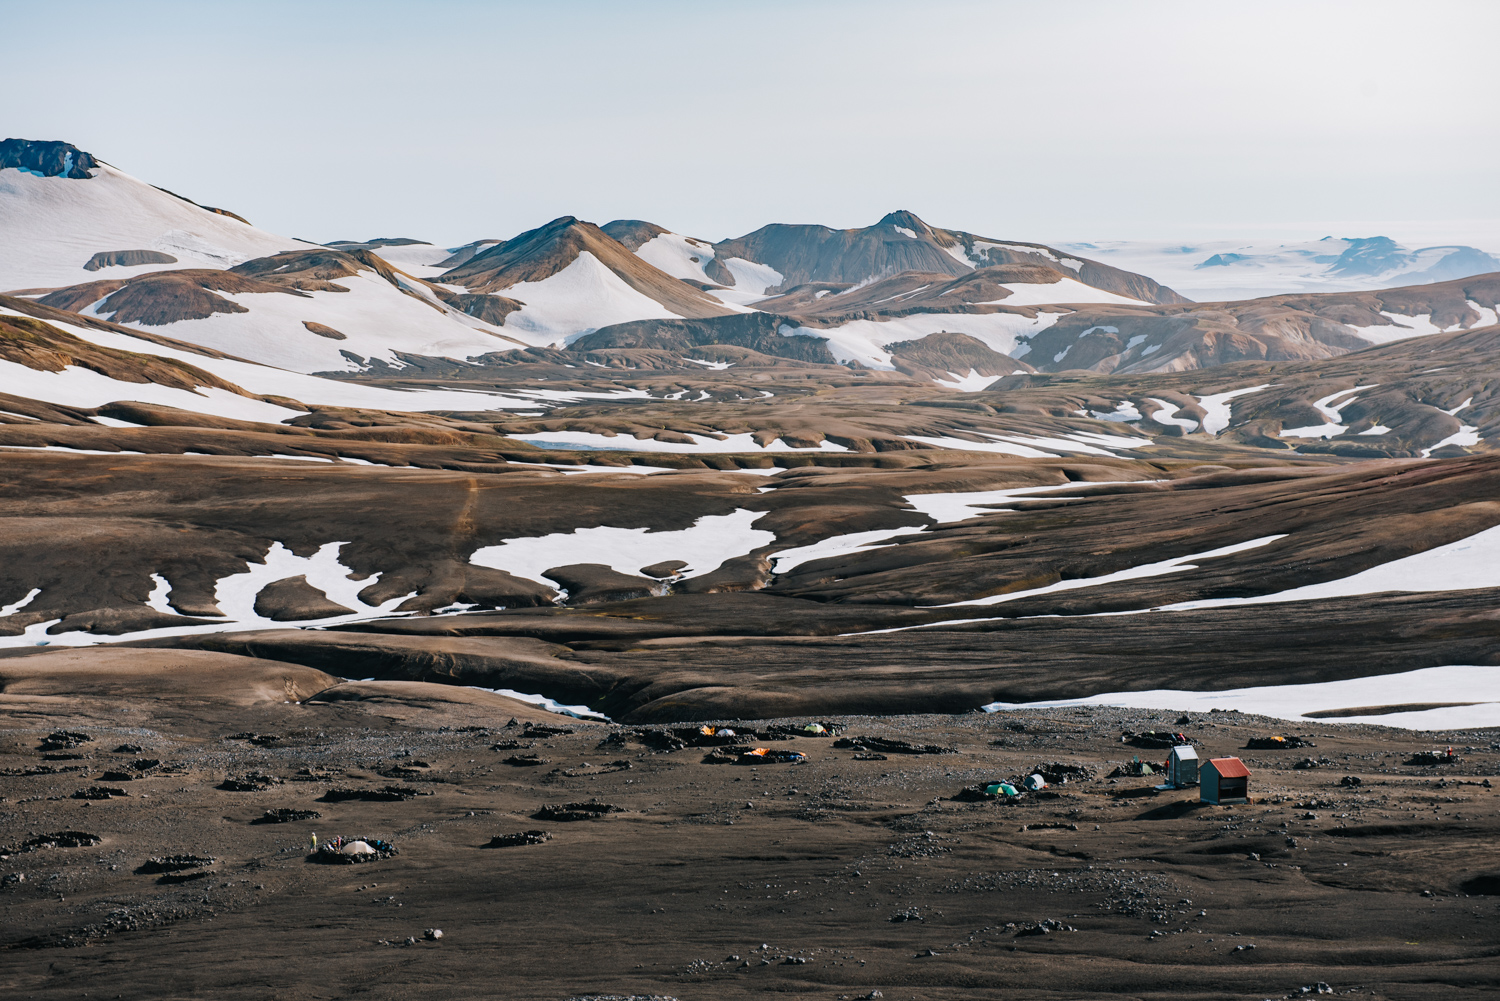
Álftavatn-Emstrur (16km, but feels longer!)- cross a river early after starting, and then pass some nice falls and cross another river. Then you get into the black sand desert, which can seem to go on forever. The huts can seem like you’ll never get to them, until you finally come over a peak and stumble upon them.
Emstrur-Þórsmörk (15km)- after leaving Emstrur, you’ll get to a deep canyon that you have to cross. There is a wooden bridge to go over, which is fairly high up. After this, the trail is fairly flat, running between ravines. You’ll have one more steep hill to climb and then you’ll get to a large river to cross, the Þröngá. This river is a glacier river so it’s really muddy. It’s also wide and rocky with a strong current, so take care crossing here. Once you cross, you’re into a wooden area and on your way to Thorsmork. Pay attention to the signs when you get to the intersection! You’ll want to make sure you’re heading towards the proper hut.
After that, if you decide to go onto Skogar, it is another 25-30 km depending on which hut you leave from.
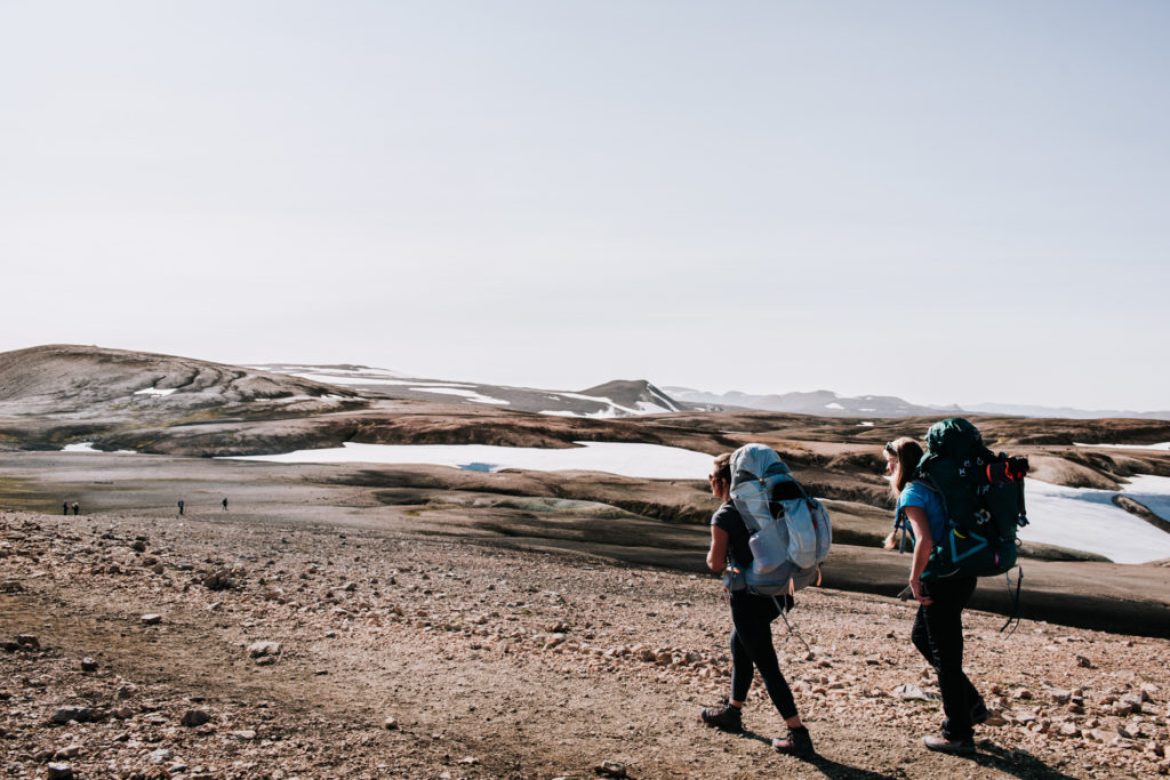
Gear
What you pack will depend on whether you are camping or staying in the huts. We camped, so I’ll tell you what we recommend bringing.
-a good hiking pack (obviously)
-tent; lightweight and waterproof
-a really good sleeping bag; it gets cold at night
-a stove; we brought an MSR whisper light stove and four canisters of white fuel, which ended up being overkill
-camping chairs; we brought lightweight camping chairs, which made sitting around after hiking all day much more enjoyable
-good (waterproof) hiking boots; make sure to take them for some test hikes before taking on the trail, and ensure they are the right size
-spare shoes that are lighter weight, or water shoes, to cross the rivers (you don’t want to do it barefoot)
-good hiking socks, several pairs
-gloves and a hat
-blister bandaids, and a good first aid kit
-water bottles (you can refill in the fresh water streams and at the huts)
-food; we brought the dehydrated meal packs, canned tuna, some hard vegetables and apples, granola bars and other hiking staples
-clothes; bring layers. You’ll want merino wool base layers, and make sure to bring a down jacket that you can pack up small
-rain gear; Gore-tex jacket and pants. When it rains in Iceland, it can be relentless. Make sure to waterproof your hiking pack, whether it’s lining the inside with plastic bags or buying a pack cover.
-headlamp; it’s always more enjoyable to have your hands free at night to cook dinner and set up the tent, so a headlamp is a must
-dishes, cutlery, knife. Pack the lightest stuff you can find, and only what is necessary.
-other miscellaneous items; trekking poles, playing cards, camera (a must), rope, coffee and tea, face/baby wipes (you probably won’t shower until the end), and bourbon (you don’t want to carry beer on this hike).
This blog is a work in progress, and will be updated as I gather more booking information, maps and photos.
Fire and Ice | Norfolk Chiropractic
[…] The Laugavegur Trail →← How to make small changes to your sitting routine […]